How to Practice Synthesizer Sound Design Without Overthinking It
Synthesizer sound design is often overloaded with intimidating terms like oscillators and filters. Learn how to skip the complicated theory and dial in your ideal sound using 6 intuitive, high-impact parameters starting from presets.

💡 Quick Summary (TL;DR)
Don’t get stuck in engineering theory! Start with a synth preset closest to your vision, then adjust just 6 intuitive knobs:
- Cutoff & Resonance: Controls brightness, sharpness, and warmth.
- ADSR (Attack, Decay, Sustain, Release): Shapes how the note starts, sustains, and fades out.
Need a thicker sound? Layer a second Oscillator an octave up or down.
Golden Rule: Leave Tune, Fine, and Coarse knobs alone unless you intentionally want an out-of-tune sound!
When composing and arranging in a DAW, one obstacle almost everyone inevitably runs into is the hurdle of synthesizer sound design.
Whenever you try researching how to design synth patches, you are immediately bombarded with terms that sound like an electrical engineering course: oscillators, filter circuits, VCAs, LFOs, signal waveforms, and so on.
If you have a background in electrical engineering or computer science, this might feel somewhat approachable. But the truth is, most creators do not.
So let’s skip the complicated theory for now. The best way to start is by tweaking the specific parameters that produce the most immediate, controllable changes to your ears, and dialing in your ideal sound from there.
The Common, Easy-to-Remember Parameters That Clearly Change the Sound
Let’s skip structural and technical explanations as much as possible.
First, browse through your synthesizer’s presets and find the patch that comes closest to what you’re imagining. Even if it isn’t 100% perfect, pick one that catches your interest—we’ll use a few key parameters to shape it into your ideal sound.
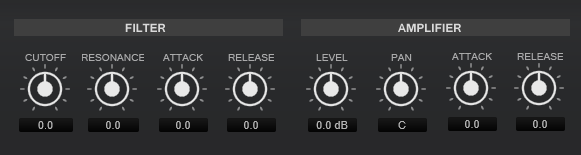
Typical Filter & Amplifier controls found in subtractive synthesizers.
- Cutoff - Affects high frequencies. Generally, at 100% the sound is bright (the original character). Turning it down cuts the highs, giving you a darker, rounder, more muffled tone.
- Resonance - Creates a peak around the Cutoff point. Depending on your Cutoff setting and the base sound, you might hear a dramatic sweep or barely any difference.
- Attack - The onset of the note. How quickly the sound reaches full volume the moment you press a key.
- Decay - The decay time. How quickly the sound drops to a sustained level while holding down the key.
- Sustain - The resting volume level while holding a key down after the decay phase. At 100% / maximum, the sound never fades as long as you hold the key.
- Release - The final tail. How long the sound takes to completely fade out after you let go of the key. At 100% / maximum, the note will ring out almost indefinitely.
Start by locating these 6 parameters among your synth’s knobs and sliders. They might be spelled out fully, abbreviated simply as A, D, S, and R, or simplified with fewer controls (for instance, skipping Decay or Sustain).
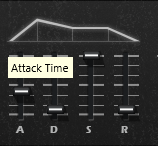
ADSR Envelope: Visualizing the 4 stages of dynamic volume and filter shaping.
With Cutoff and Resonance, you decide the brightness, sharpness, or warmth of the tone. With Attack, you control how the sound starts, and with Decay, Sustain, and Release, you shape how long and smooth the sound sustains.
Just tweaking these controls produces immediate, obvious changes, and there’s a strong chance you can finish a great custom sound starting from a simple preset.
When You Want to Change the Sound at Its Core (Adjusting the Oscillator)
If a preset is nowhere near what you want and adjusting the envelope isn’t enough, you can change the fundamental source of the sound itself.
Look for a section labeled OSC (Oscillator).
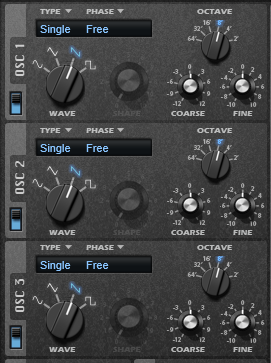
Multi-oscillator generator section with Waveform, Octave, and Tuning controls.
This might sound a bit technical, but simply think of the oscillator as the fundamental root tone of the synthesizer. This is where the core waveform is generated.
When a synth has multiple oscillators (like OSC 1, OSC 2, etc.), pressing a single key can trigger multiple sound sources simultaneously. You can play one oscillator an octave higher or lower (Oct or Octave) to thicken the sound, or choose different wave shapes (Wave) on OSC 1 and OSC 2 to blend contrasting textures together.
Each oscillator usually has its own independent Volume knob, so you can balance the blend between them.
People often say you need to memorize every waveform type, but just play a note and try it out: jagged, straight-edged wave icons generally sound sharp, buzzy, and aggressive, while smooth, rounded curved icons sound softer and warmer. That’s more than enough intuition to start tweaking (even if an engineer wouldn’t consider that an exact scientific definition!).
Parameters to Be Careful With (Leave Them Alone Unless Necessary)
Conversely, there are certain parameters you should be cautious with—and generally leave untouched unless needed: Tune, Fine, Coarse, and Detune.
These controls adjust pitch in fine or coarse increments. If you accidentally bump them, your keyboard notes might be technically correct, but the pitch will clash horribly with other instruments in your track—nothing you play will sound in tune.
If your synth suddenly sounds sour or out of tune, check these pitch knobs first and make sure they are centered at zero.
Even with a high-level walkthrough like this, synthesizers can understandably feel intimidating due to their internal complexity. But if you’ve ever felt overwhelmed by synth design, I truly hope this straightforward approach helps you take that first fun, confident step.
Experience Intuitive Sound Design with “Wonder synth01”
Aiming for a synthesizer that lets you produce great, straightforward sounds without overthinking it, we developed Wonder synth01 here at Lo-bit record.
With effortless mode switching and a minimal set of essential controls, it allows you to shape musical tones instantly without getting bogged down in complex parameters.
On the product page, you can purchase the full instrument or download the free trial demo. Furthermore, at the bottom of the page, there is an interactive in-browser playable demo powered by Web Audio and Web MIDI!
If you connect a USB MIDI keyboard to your computer, you can even play it directly inside your browser right now:
*Tracks created using the environments, gear, and techniques featured on this site are available for preview and free download in the Lo-bit LAB Free BGM Library. Continuously updated.*
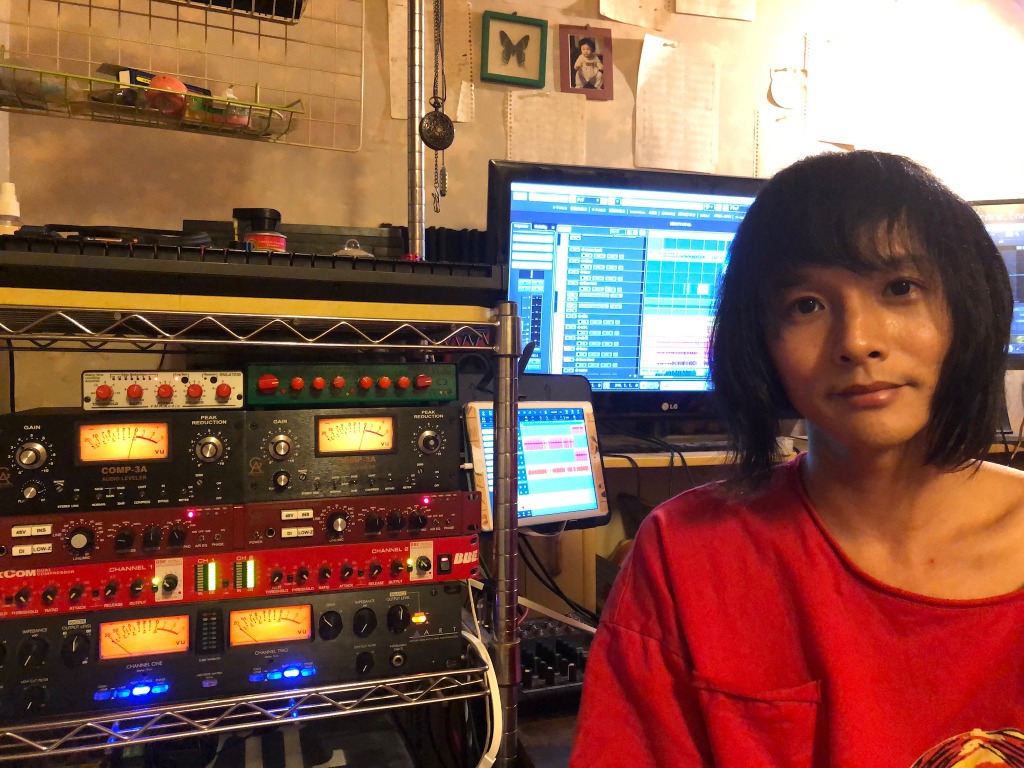
Lin Wolinski / Lo-bit record
Musician, Recording & Mixing Engineer, Music Instructor (Guitar, Bass, DTM, Composition & Arrangement), and C++ Audio DSP Plugin Developer.
Active as Bassist, Synthesist, Backing Vocalist, and Composer/Arranger for the rock band "Once Grace Forever".
Following musical study in Australia, actively engaged in professional music production, bespoke mixing & mastering, boutique audio plugin development under "Lo-bit record", releasing royalty-free music assets, and authoring audio engineering resources.